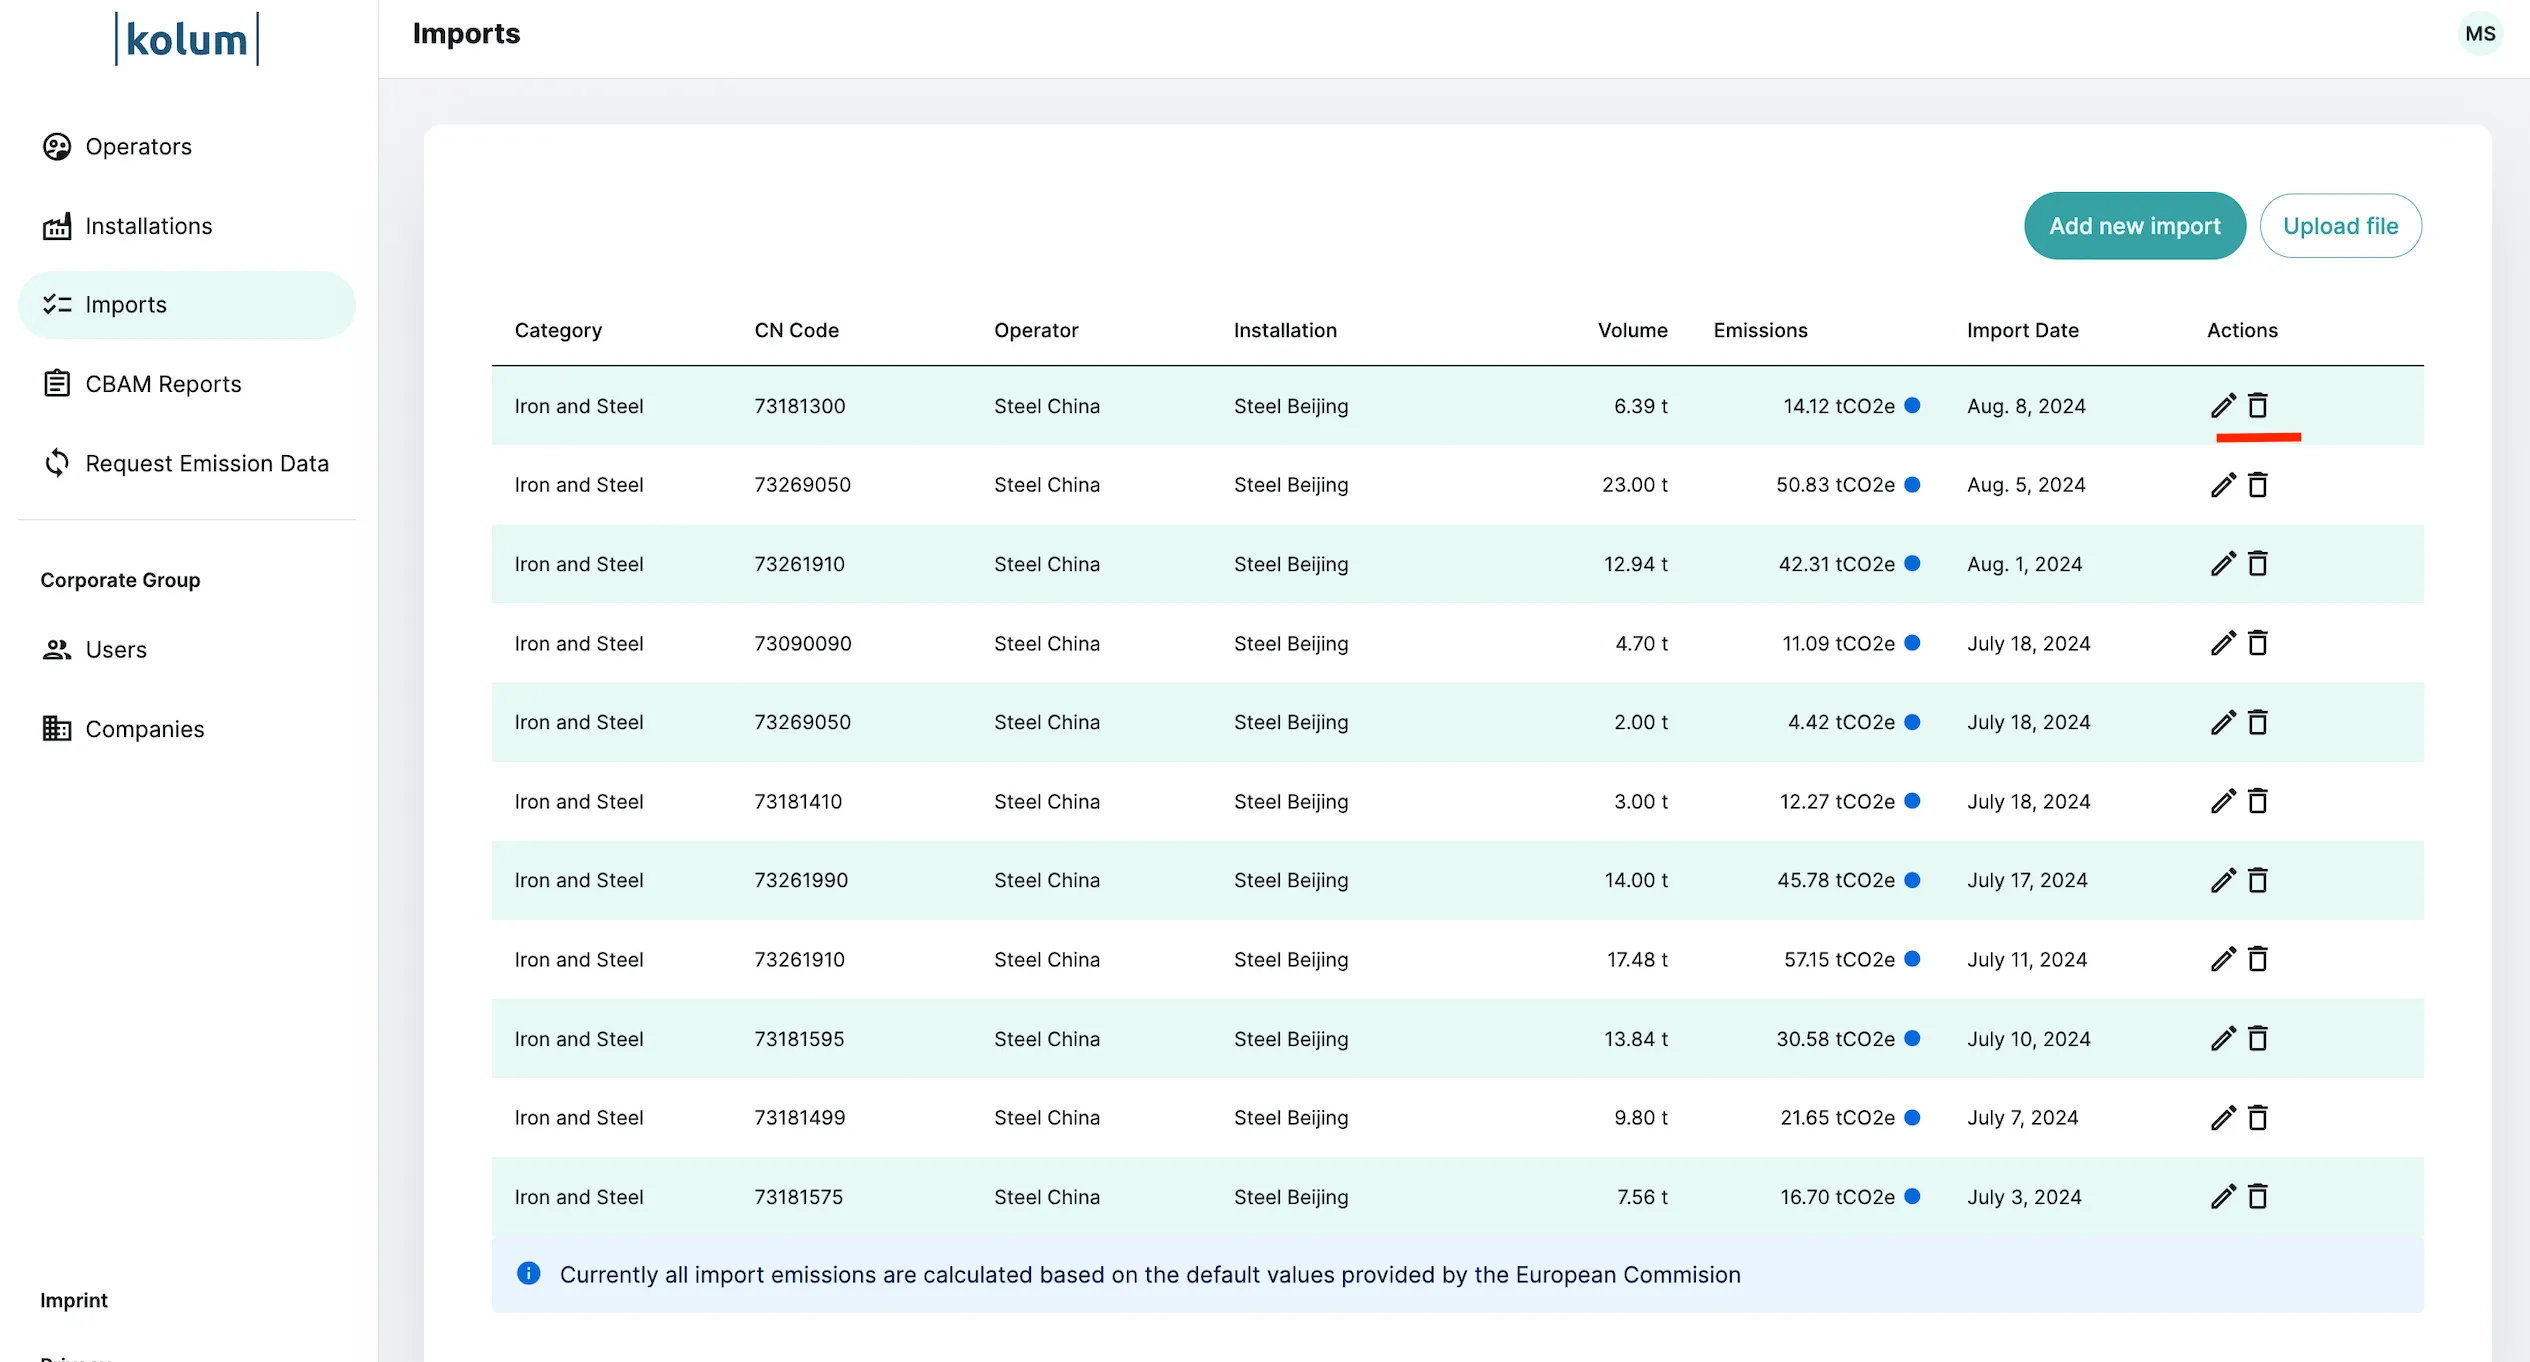
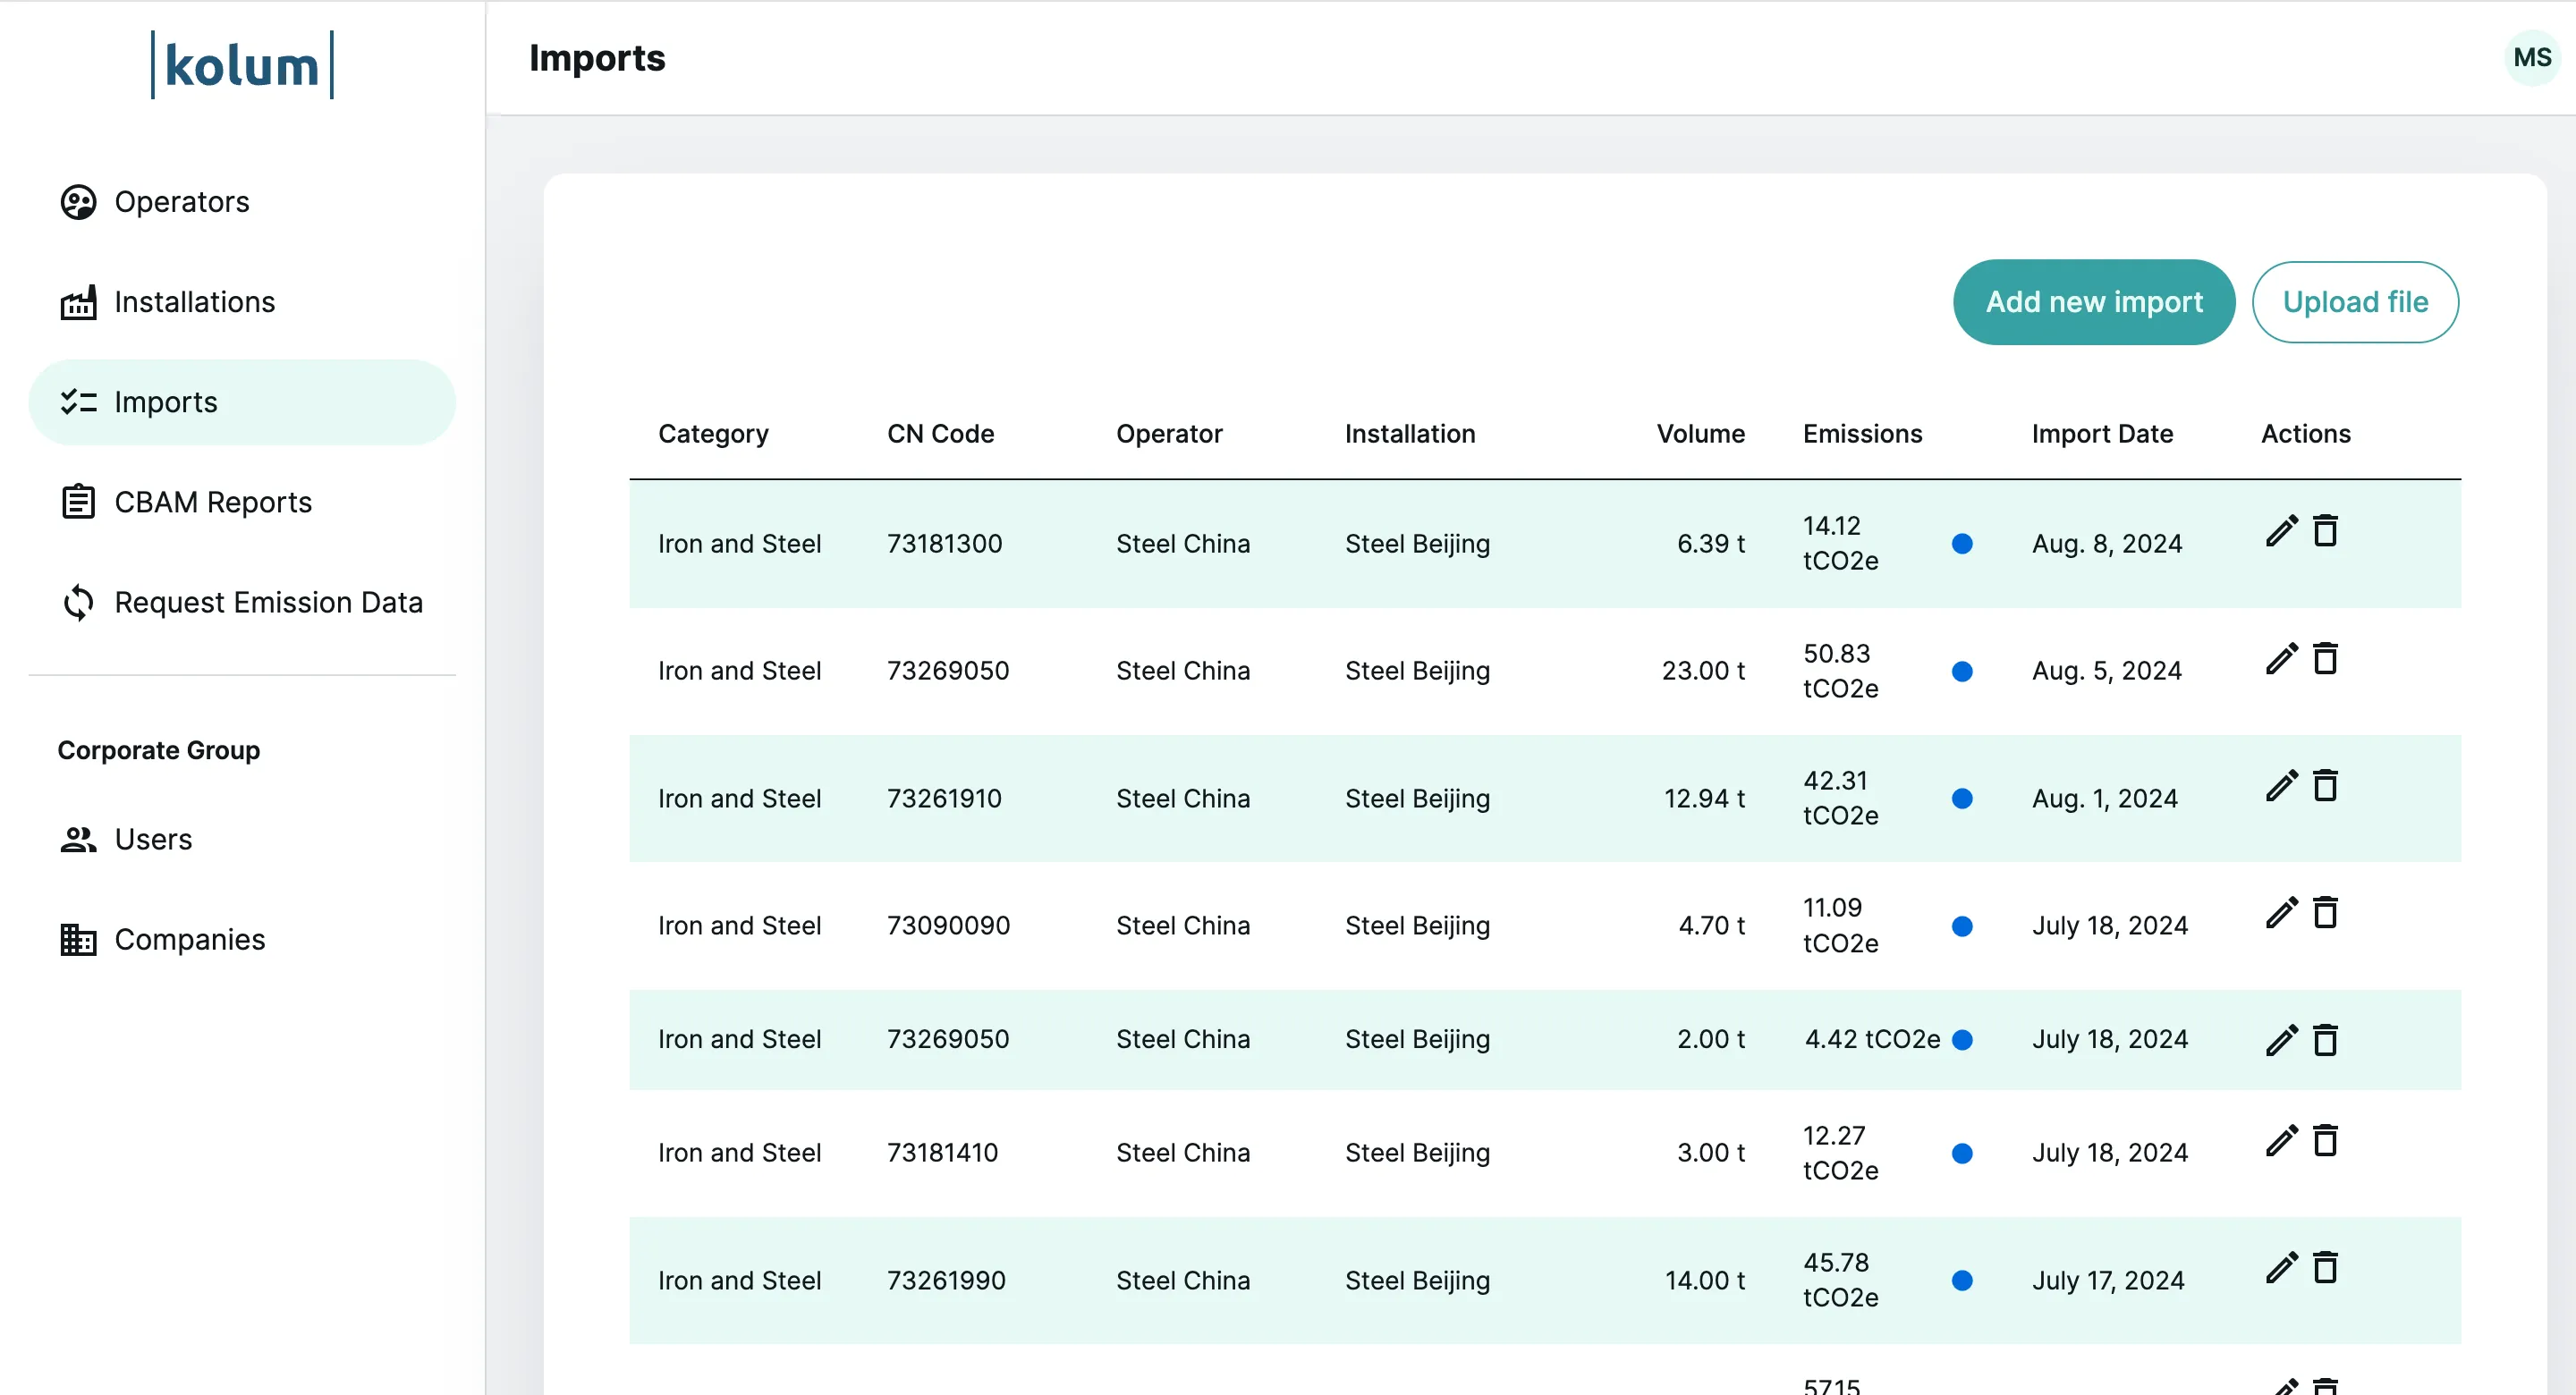
5. Manage imports
Edit Imports
In the navigation bar under “Imports,” you can manage all your import data. To edit individual imports, click the “pencil icon” in the respective import row. In the window that opens, you can edit the details of your import.
Add Imports
You have two options to add new imports:
Option 1: Manually Add Imports
To manually add an import, click the “Add new Import” button. In the window that opens, you can enter the import data. The following table provides an overview of the data points that must or can be specified for the import:
| Data Point | Description | Mandatory? |
|---|---|---|
| Company Selection | ||
| Company | Select the company for which the import is to be created. If you only have one company (1 EORI number), this step is skipped. | Yes. Automatically if only 1 EORI number. |
| Operator | ||
| Operator | Select the operator from the dropdown. From Q3/2024, operator information is mandatory. | Yes |
| Installation | Select the installation where the imported goods were produced from the dropdown. | Yes |
| Goods Specification | ||
| Good Description | Specify the imported goods to help the operator in the third country unambiguously identify the requested goods. | No, optional. |
| Good Reference Number Type | Specify the type of reference number you are using for the goods. This helps the operator understand which type of reference number is meant. Examples include “Invoice Number,” “Part Number,” etc. | No, optional. |
| Good Reference Number | Enter the actual reference number for the goods to help the operator accurately identify the requested goods. | No, optional. |
| Import Data | ||
| Good | Select the 8-digit CN Code of the imported goods from a dropdown menu. You can also directly enter a numerical value in the field to filter the list. | Yes |
| Volume | For almost all customs tariff numbers, specify the volume of the import in tons. Only for electricity (27160000) should the volume be specified in MWh. | Yes |
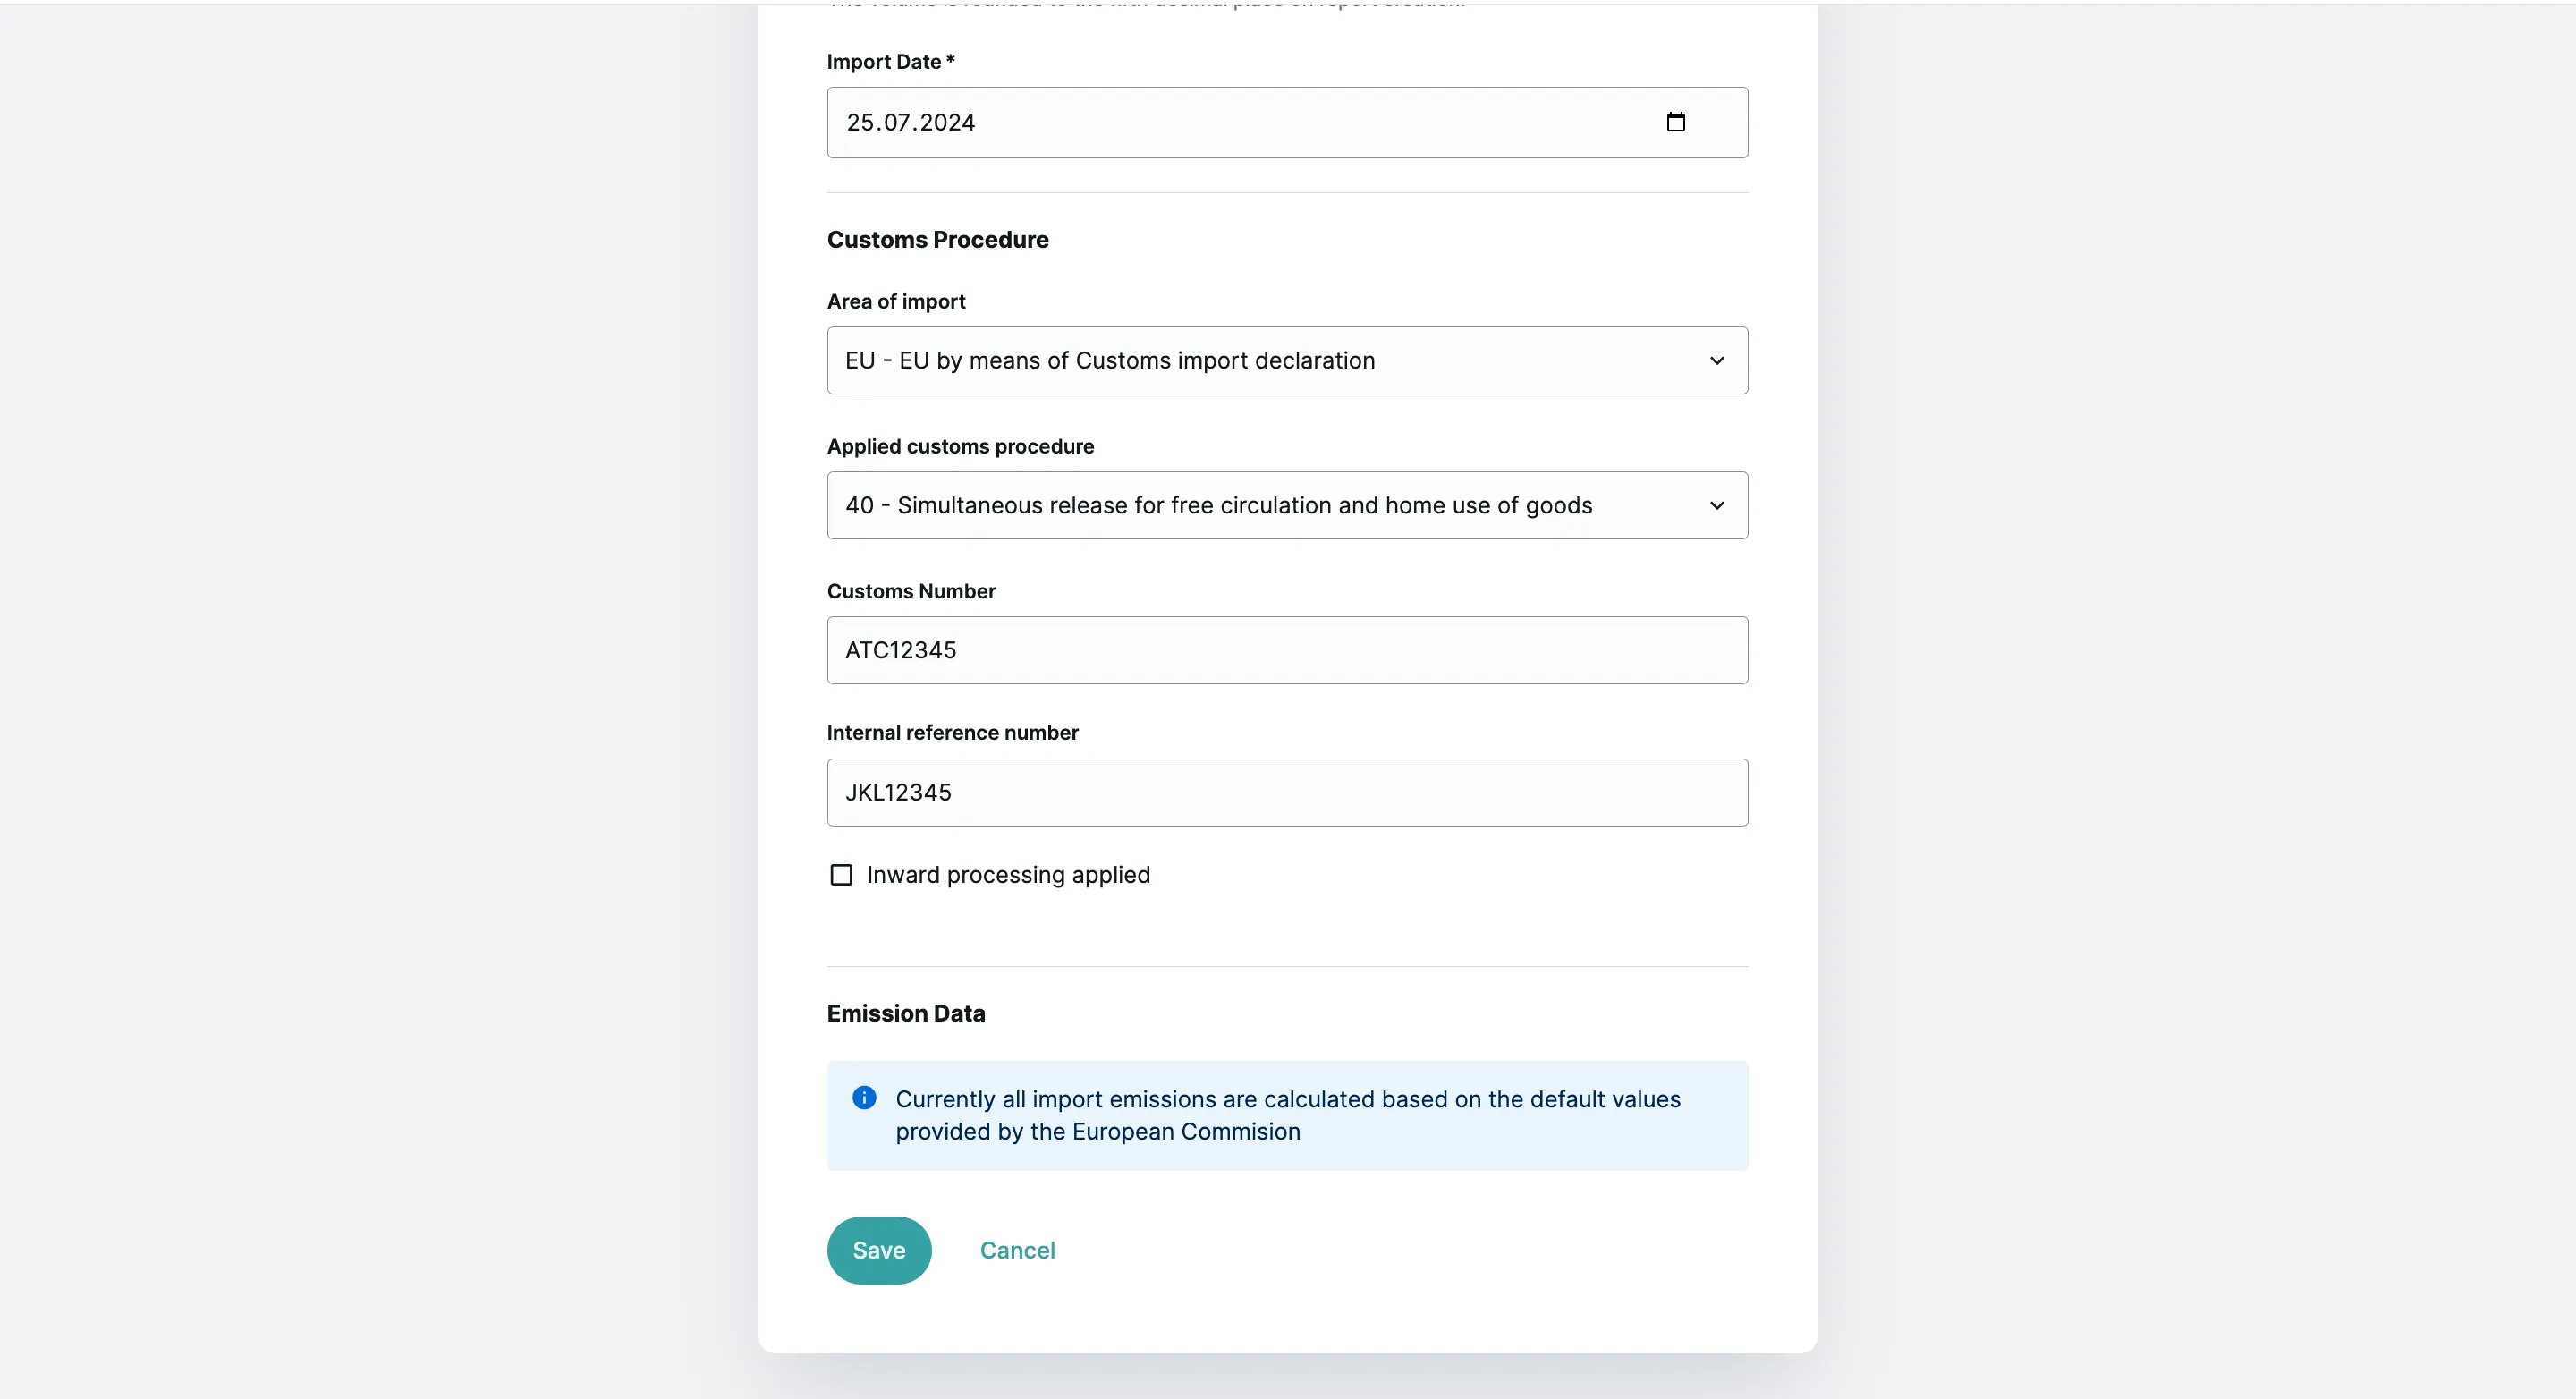
| Import Date | Specify the date on which the import occured | Yes |
| Customs Procedure | ||
| Area of Import | Select “EU” if the goods were imported via a standard customs declaration. | Yes |
| Applied Customs Procedure | Select the customs procedure used for importing the goods. | Yes |
| Customs Number | Enter the customs number to retrospectively assign imports customs-wise. | No, optional. |
| Internal Reference Number | Enter an internal reference number (e.g., an item number) to retrospectively assign imports. | No, optional. |
| Inward Processing: If Inward Processing was applied, you can provide additional details by clicking the checkbox. | ||
| Previous Customs Procedure | The customs procedure applied under IP. | Only if IP was previously selected. |
| Member State of Inward Processing Authorization | State where the IP was conducted. | Only if IP was previously selected. |
| Authorization | You can provide further details about the authorization in the free text field. | Only if IP was previously selected. |
| Globalization Time Start | Date when IP started. | Only if IP was previously selected. |
| Globalization Time End | Date when IP ended. | Only if IP was previously selected. |
| Deadline for Submission of Bill of Discharge | Date for the deadline for submission of the Bill of Discharge. | Only if IP was previously selected. |
Once you have entered all mandatory data points, you can add the import to your import table by clicking “Save.”
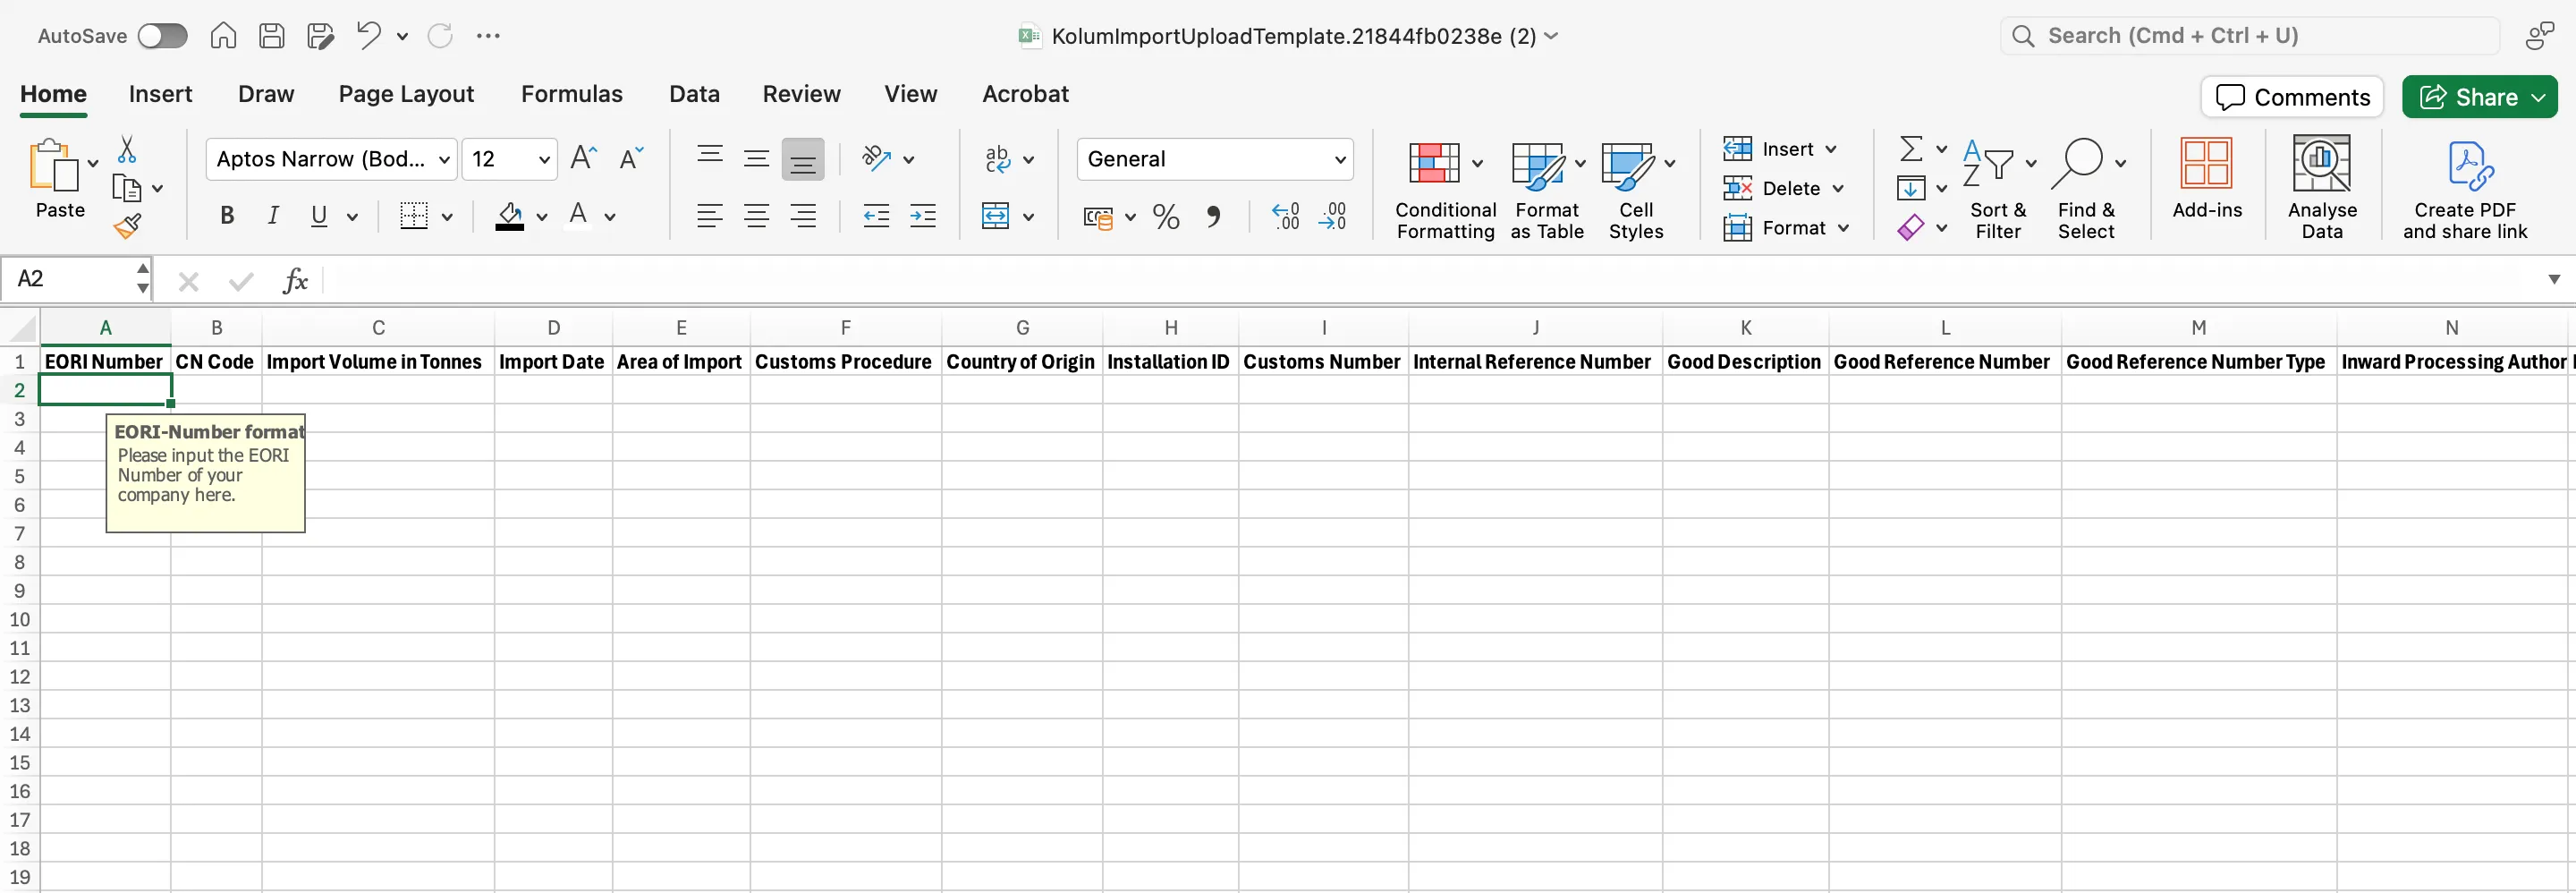
Option 2: Add Imports via Excel Upload
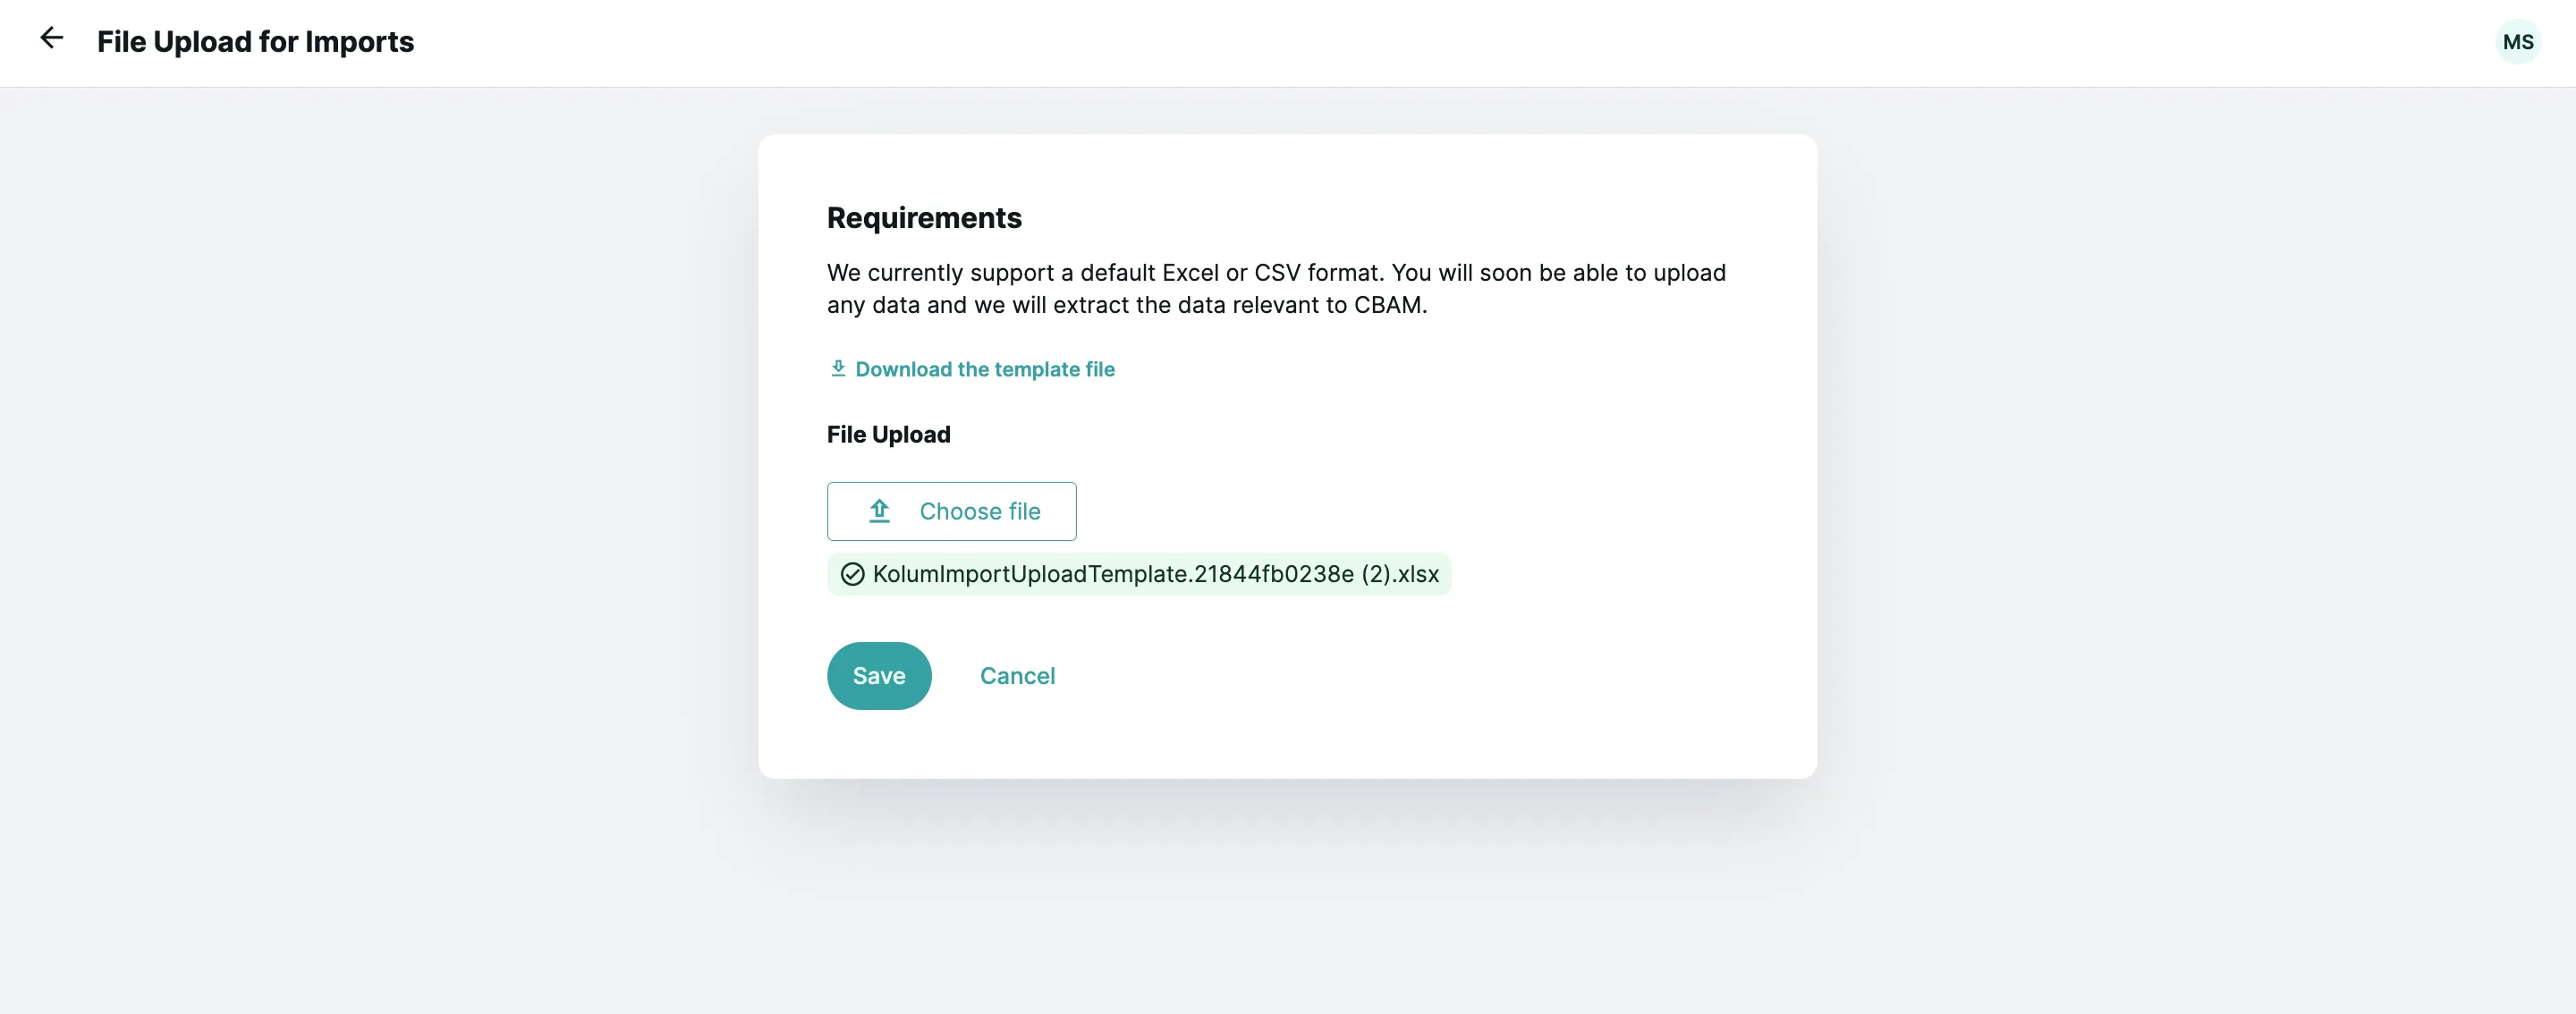
Alternatively, you can upload all your imports collectively via an Excel file. This is particularly useful if you have a large number of imports. Click the “Upload File” button. In the window that opens, you can download an Excel template at the top.
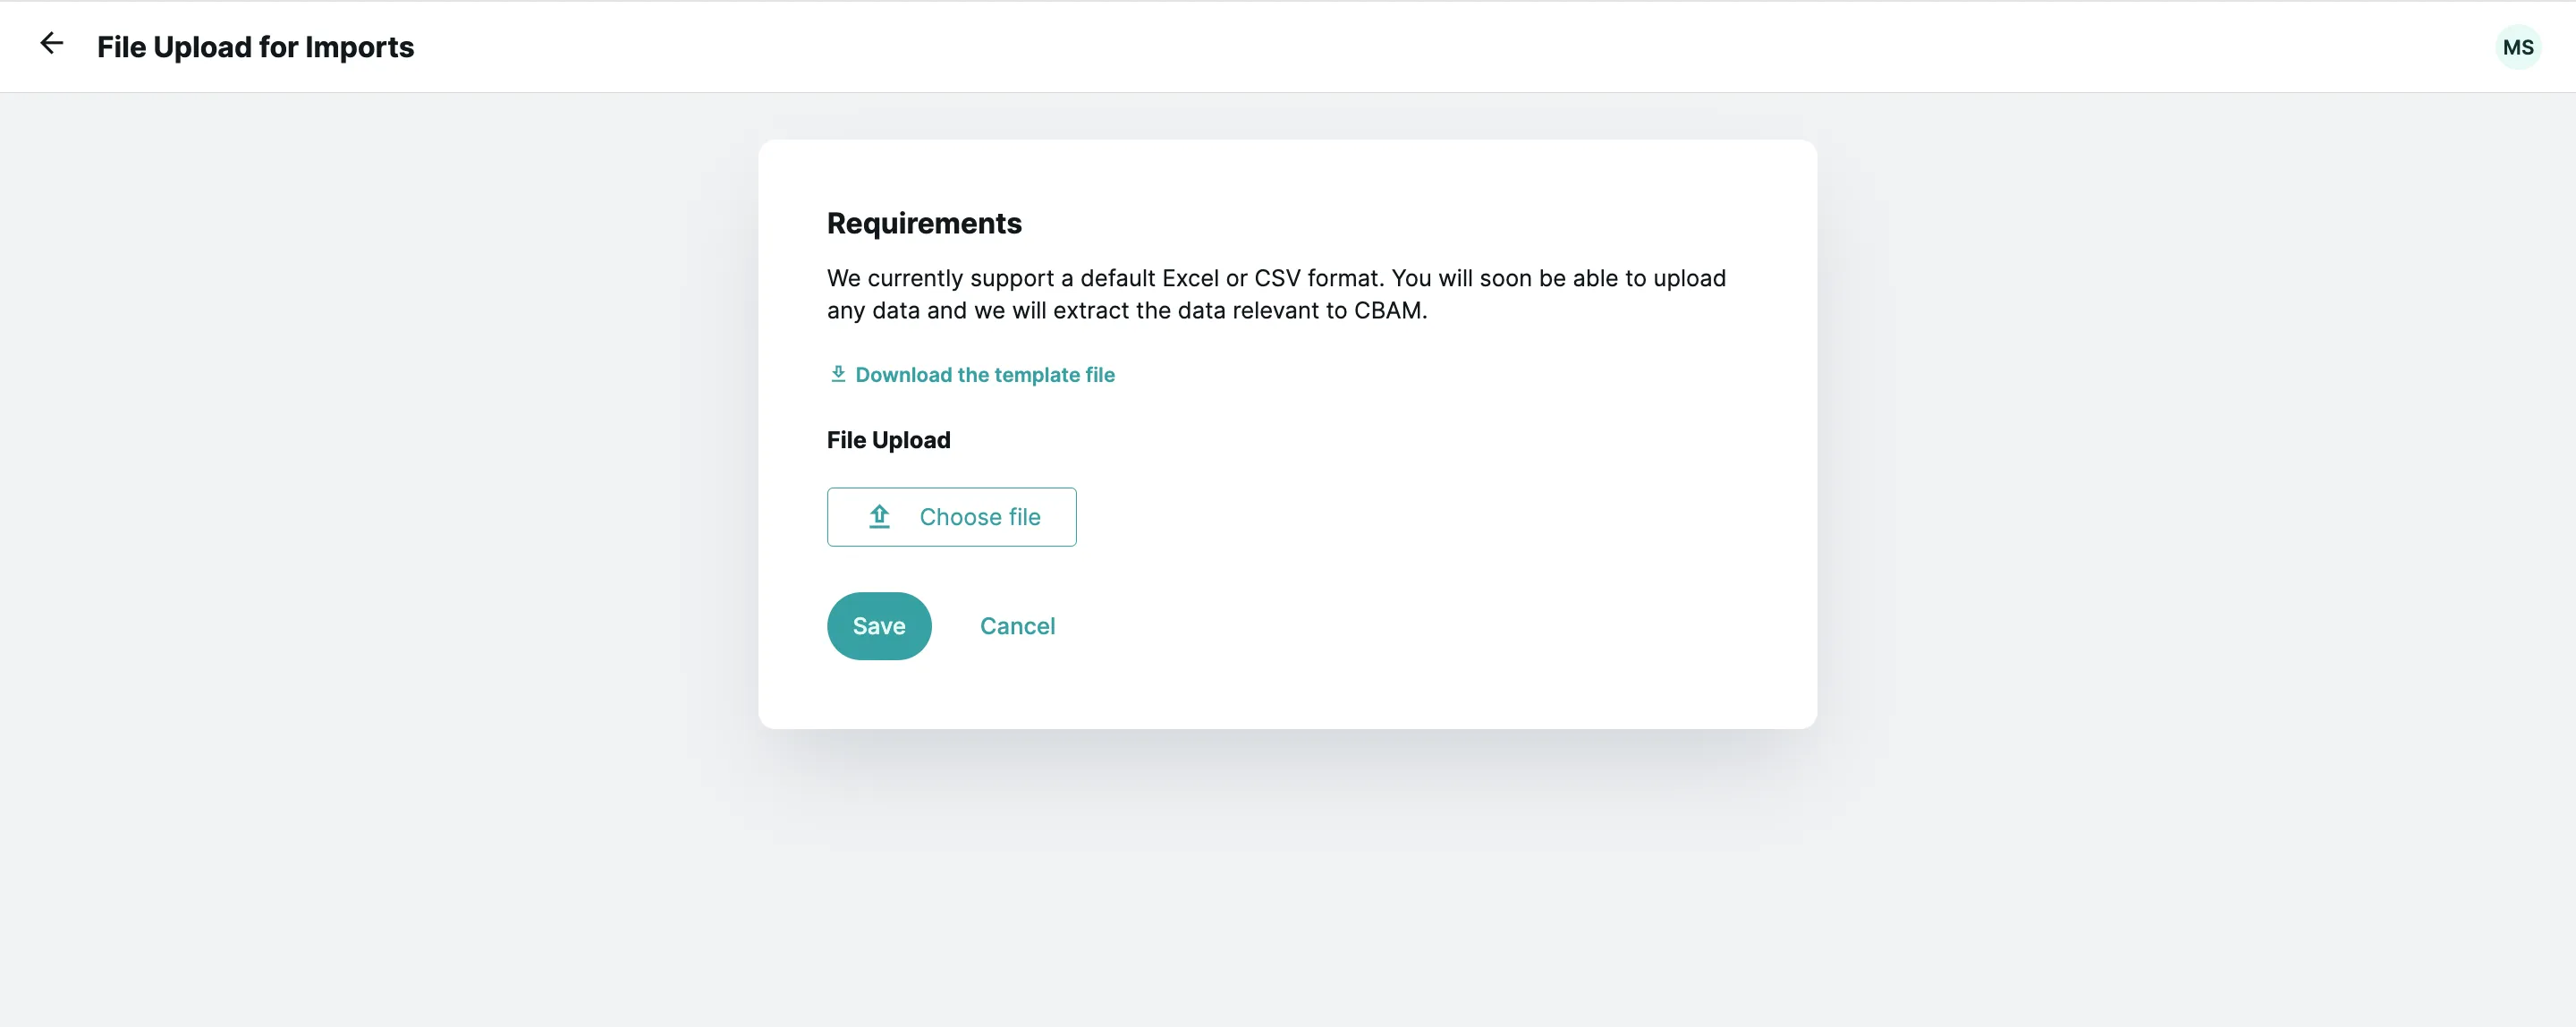
You can now fill in this Excel template with the details of your imports (see the table above) line by line and then upload them collectively.
To upload the completed template, click “Upload File” again under “Imports” and then use the button to select the Excel file from your local file system and click “Save.”
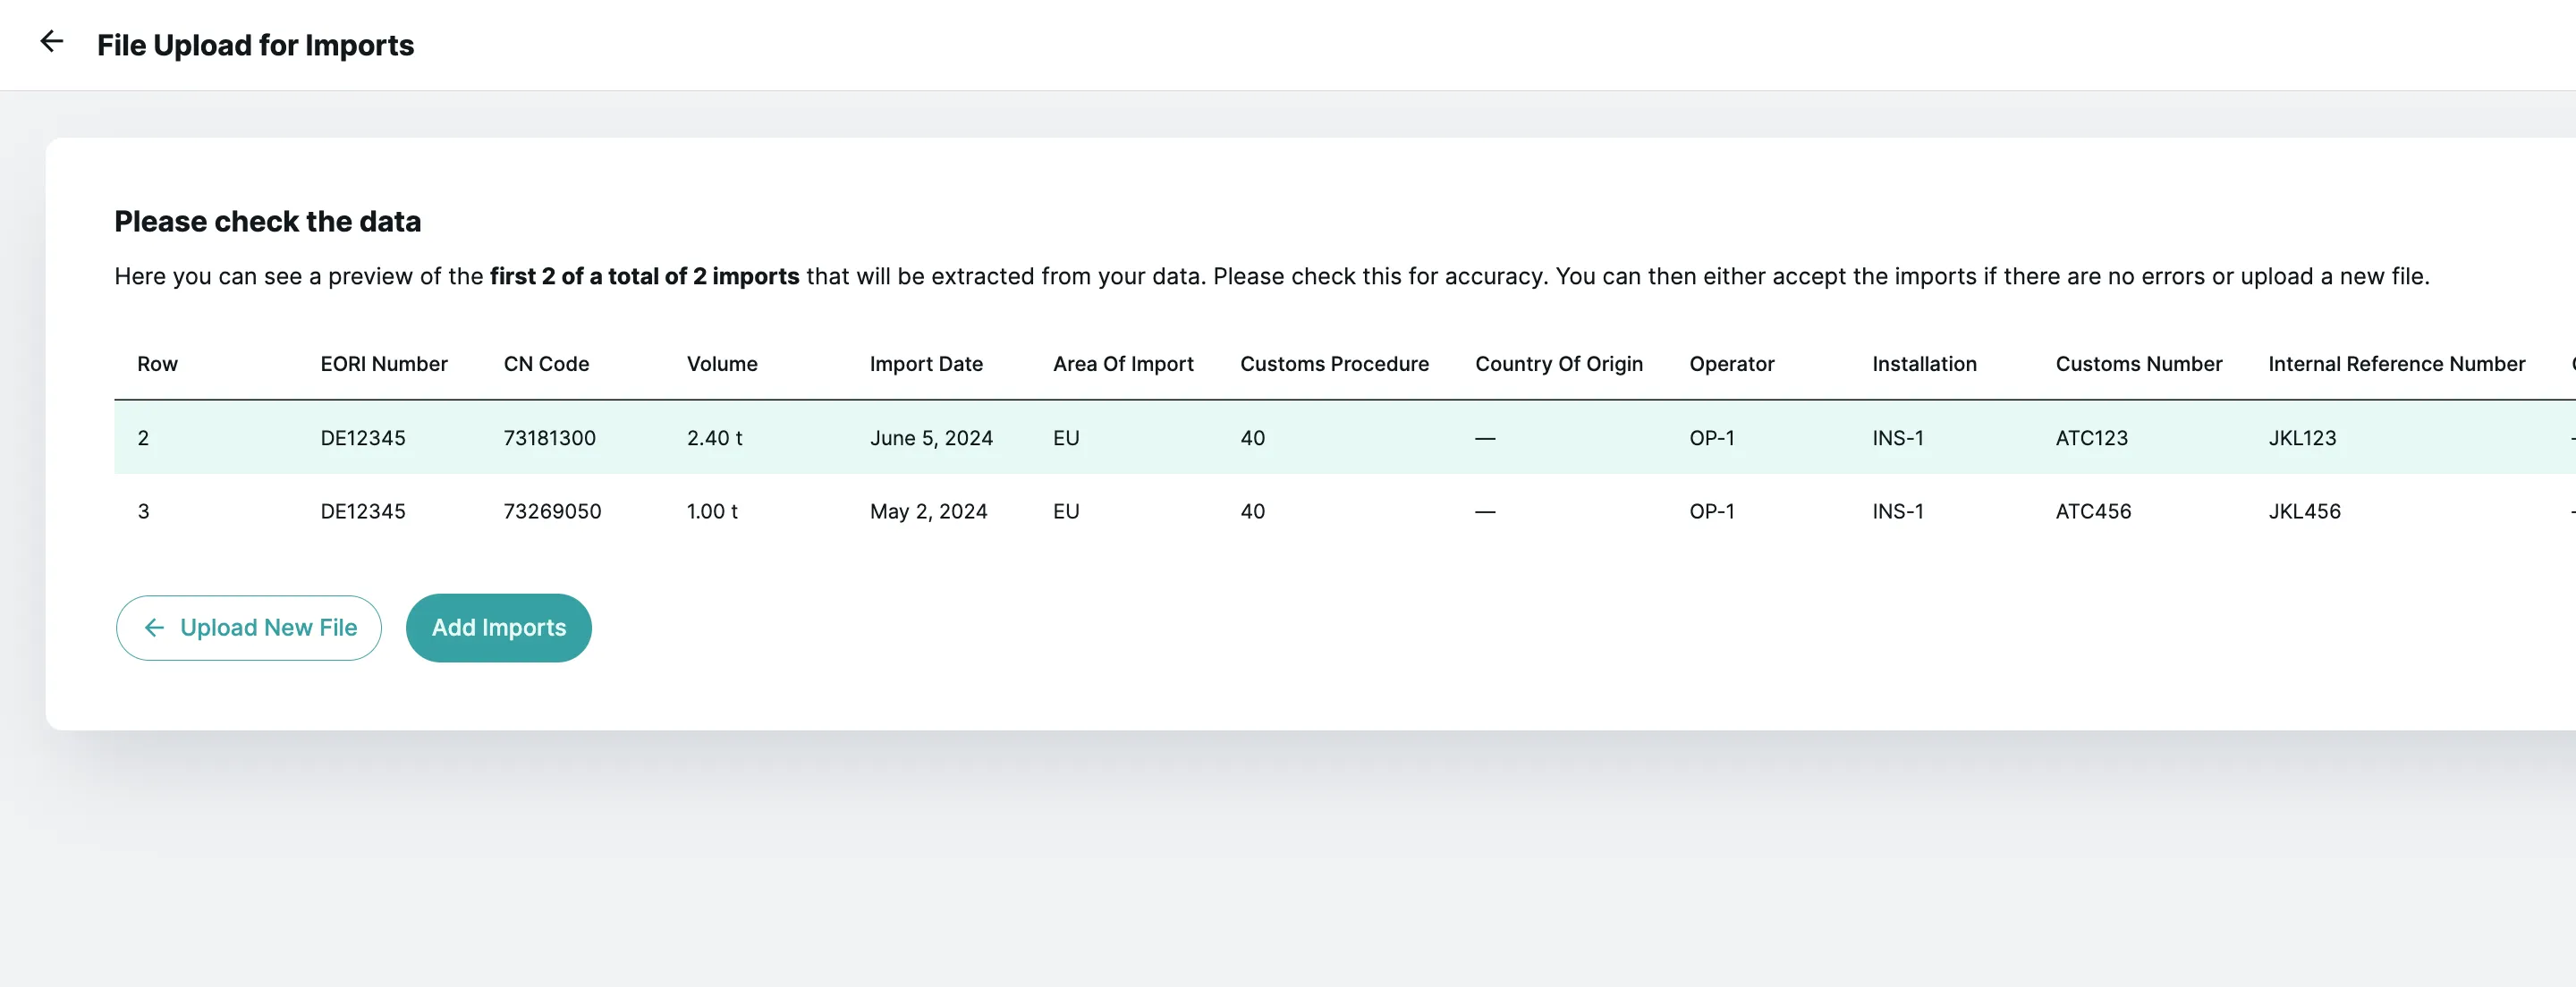
A preview of the data will then be displayed, where you can check the general format of the upload. If everything looks good and no error messages appear, you can add your imports to the kolum software by clicking the “Add Imports” button.
Delete Imports
To delete individual imports, click the delete icon in the respective table row.